Nodes are the final level of the data hierarchy and represent individual details of the Pattern
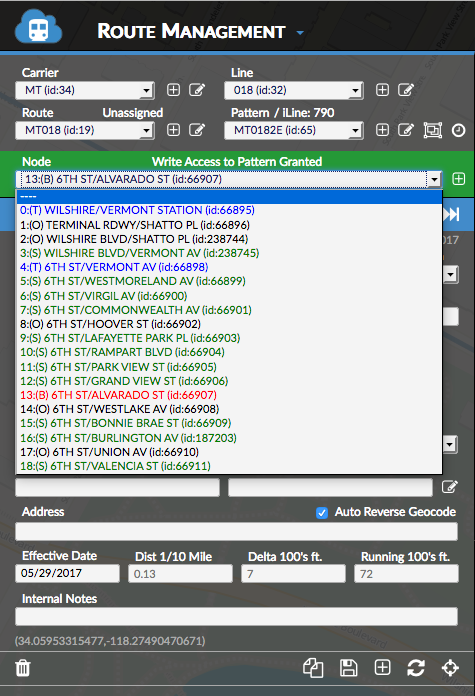 The Node list displays all Nodes that make up a Pattern. From the drop down on the left you will notice that some of the items are color coded. These colors signify the Node Types of these items.
The following are the color codes for this list:
Green : Stops
Black: Other
Blue: Time Points
Red: Stop/ Time Point
The Node list displays all Nodes that make up a Pattern. From the drop down on the left you will notice that some of the items are color coded. These colors signify the Node Types of these items.
The following are the color codes for this list:
Green : Stops
Black: Other
Blue: Time Points
Red: Stop/ Time Point
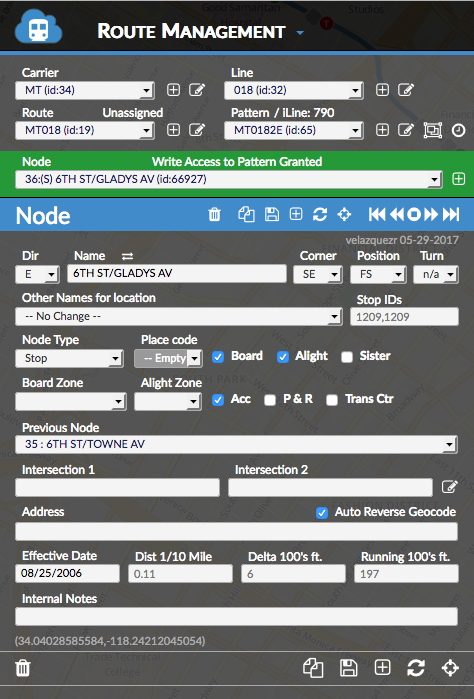
Editing a Node
To edit a Node, select it from the drop down list or click on the specific node on the map
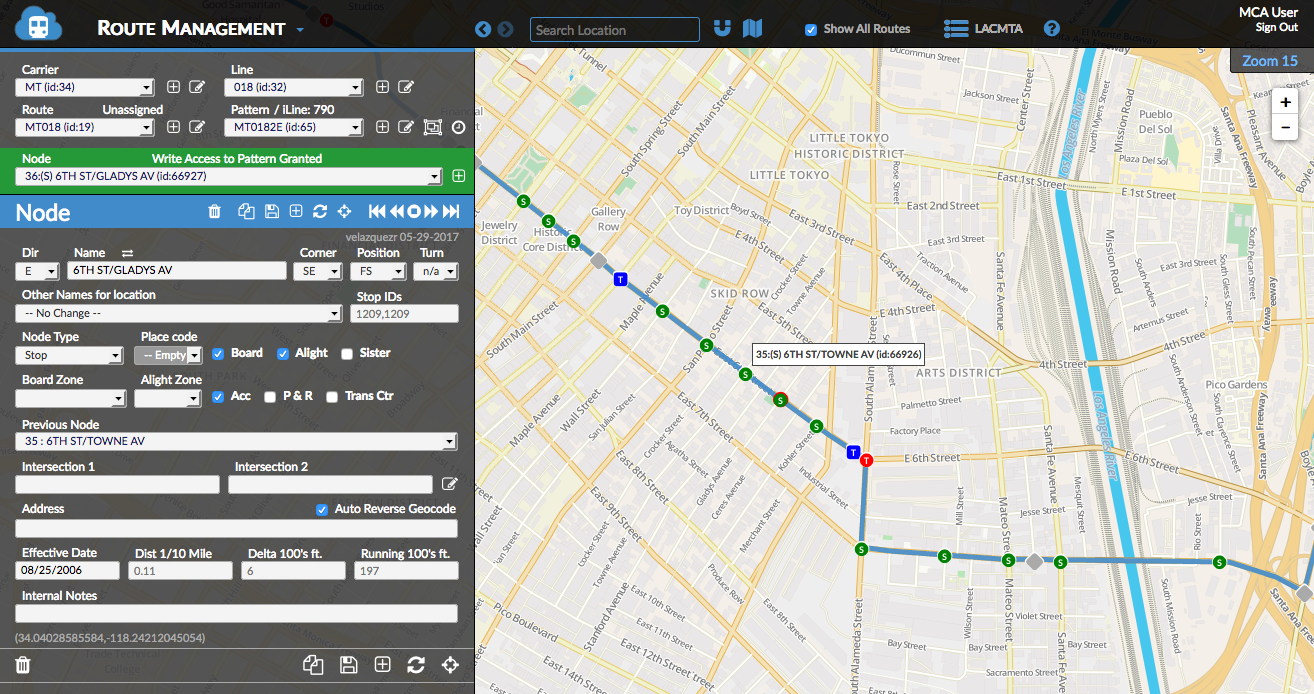 From this panel users can edit all of the details of the specific Node
Notice at the control panel around the Node drop down is green and notifies “Write Access to Pattern Granted”. This is because the system creates an exclusive lock for each of the patterns when a user is currently viewing it. To protect the integrity of the data, only one user can modify a pattern at a time.
To save the entered information click on the save button on the bottom of the panel
From this panel users can edit all of the details of the specific Node
Notice at the control panel around the Node drop down is green and notifies “Write Access to Pattern Granted”. This is because the system creates an exclusive lock for each of the patterns when a user is currently viewing it. To protect the integrity of the data, only one user can modify a pattern at a time.
To save the entered information click on the save button on the bottom of the panel
Inserting a Node
To insert a Node, click on the plus button at the top or bottom of the Node Editing Panel.
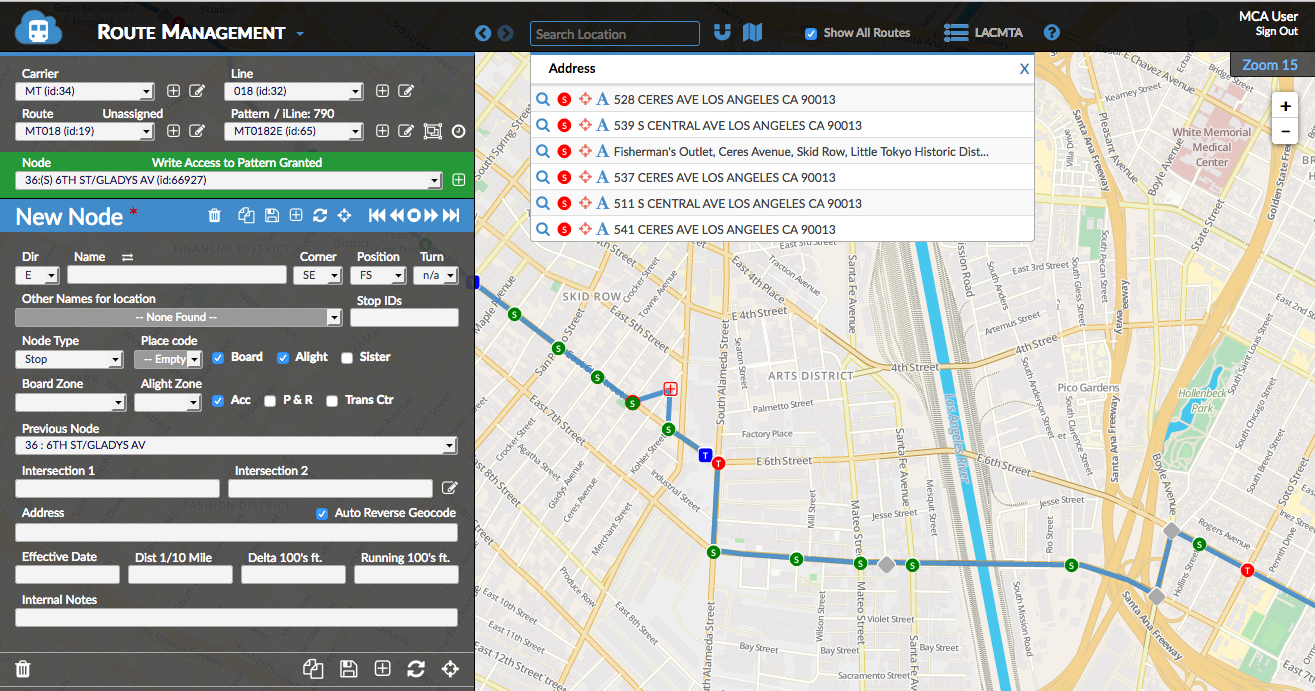 This will insert a Node and bring up the panel to enter the details into the system. This Node will be created directly after the previously selected Node.
To Change the order of the inserted Node simply change the “Previous Node” drop down box to the left of the screen.
To save the entered information click on the save button on the bottom of the panel
This will insert a Node and bring up the panel to enter the details into the system. This Node will be created directly after the previously selected Node.
To Change the order of the inserted Node simply change the “Previous Node” drop down box to the left of the screen.
To save the entered information click on the save button on the bottom of the panel
Deleting a Node
To delete a Node select it from the drop down list or by on the map.
 This will bring up the menu to edit the details of the selected Pattern.
To delete this Pattern click on the button located on the bottom left of this panel.
This will bring up the menu to edit the details of the selected Pattern.
To delete this Pattern click on the button located on the bottom left of this panel.